Whether you work as a Data Engineer or a Data Scientist, a Jupyter Notebook is a helpful tool. One of the projects I was working required a comparison of two parquet files. This is mainly a schema comparison, not a data comparison. Though the two .parquet were created from two different sources, the outcome should be completely alike, schema wise. At the beginning I was manually comparing them then I thought there must be a tool to do that. Well, that's how I found a Jupyter notebook can be useful to compare two .parquet files' schema.
The Jupyter Notebook can be used for data cleaning and transformation, data visualization, machine learning, statistical modeling and much more. This post will describe the step by step installation process of Jupyter notebook.
Step 1: Install python version 3.7.9
Python is a prerequisite for running a Jupyter notebook, so we need to install python first. Please follow this URL and choose right version to install: https://www.python.org/downloads/.
I have chosen 'Windows x86-64 executable installer' for my Windows 64 bit OS. Please choose the version as per your computer Operating system.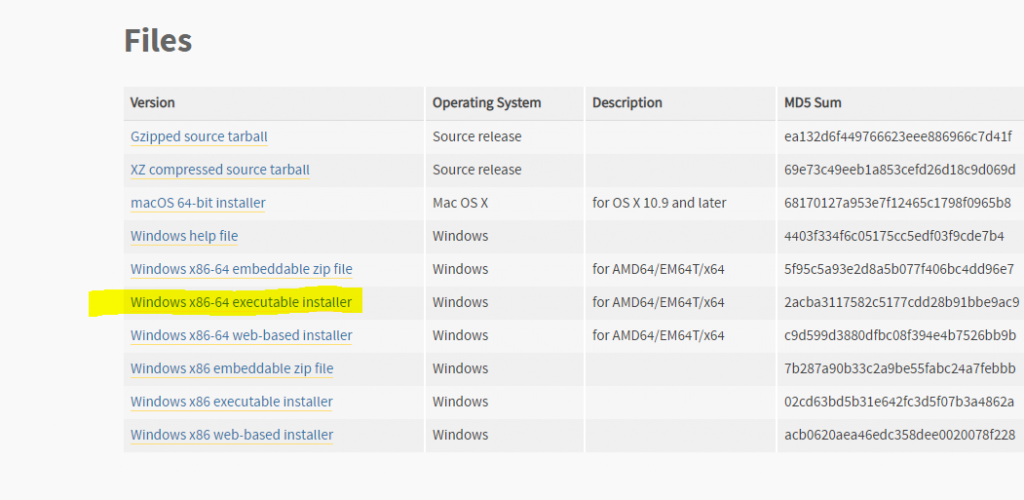
Fig 1: Windows Executable
You can download the executable file and save in any location at your computer.
Now next step is to create a 'Python' folder under the C: drive, we will use this folder as installation location at later step.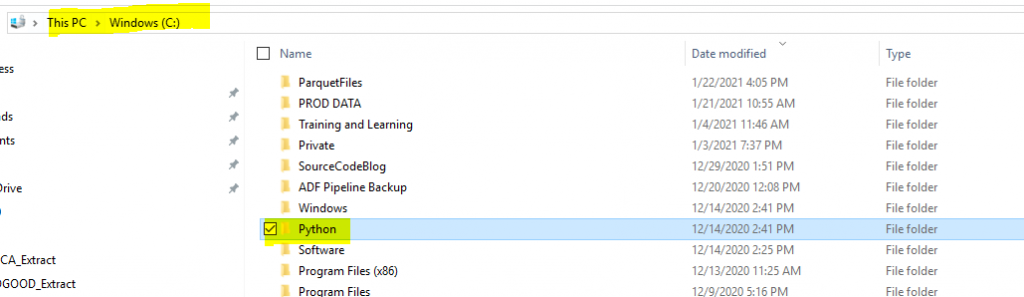
Fig 2: Python folder under C
Find out the downloaded executable file, I have saved the executable file under Downloads folder (shown in below figure 3). Now double click the executable file to initiate the installation process.
Fig 3: Python Execution file
Make sure to choose 'Customize Installation' and check mark 'Add Python 3.9 to PATH' as shown in figure 4. I followed the customization method to avoid setting up environment variable.
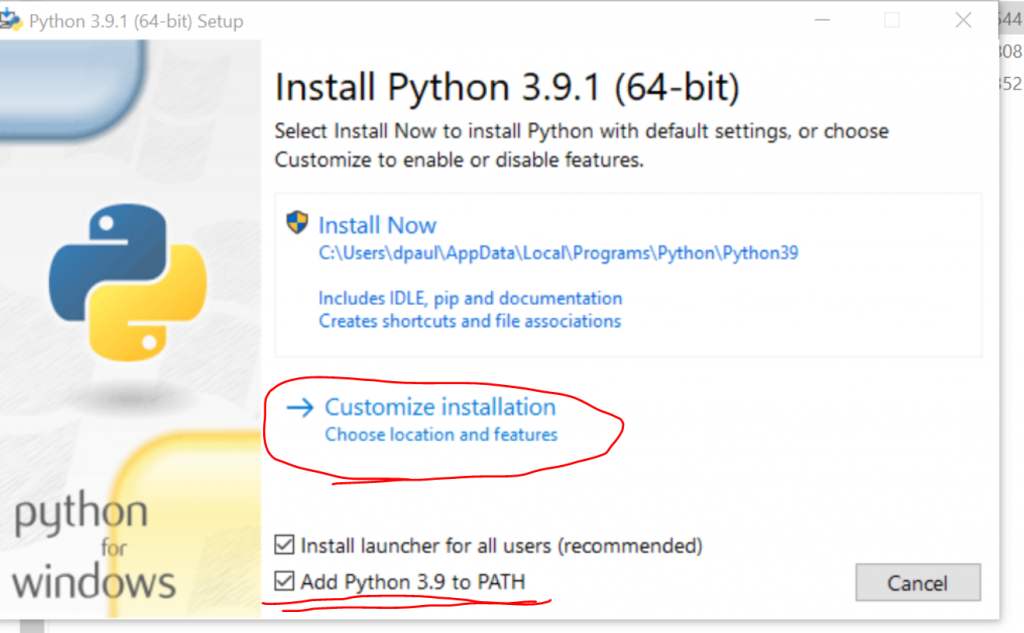
Fig 4: Python Installation wizard
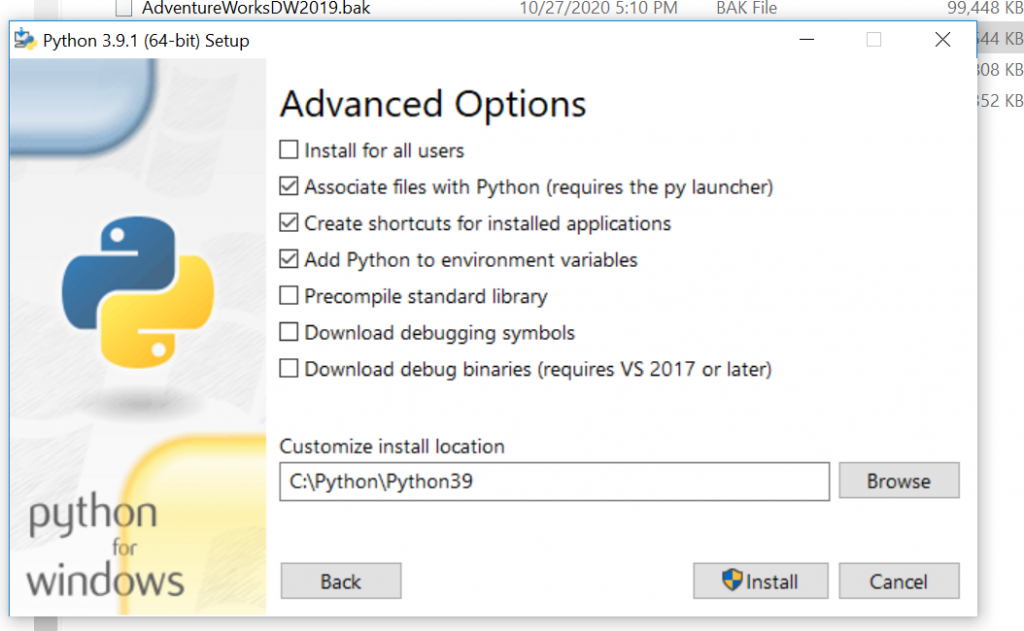
As below figure 5 shown, the Customize installation location, where make sure you put the installation location folder C:\Python\Python39. We have created 'Python' folder in C drive in earlier step (Fig 2)
Now hit the Install button. Installation will complete in a minute or two.
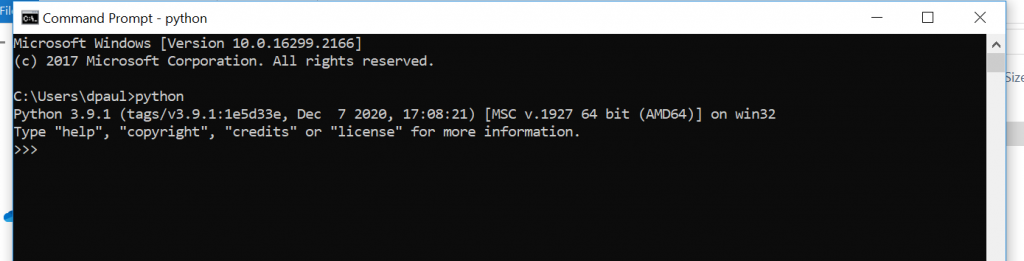
Let's test if python installed successfully, open command prompt and type "python". If python is installed correctly then you should able to see the python version number and some key help, as shown below in Fig 6.
Step 2: Install the Jupyter Notebook
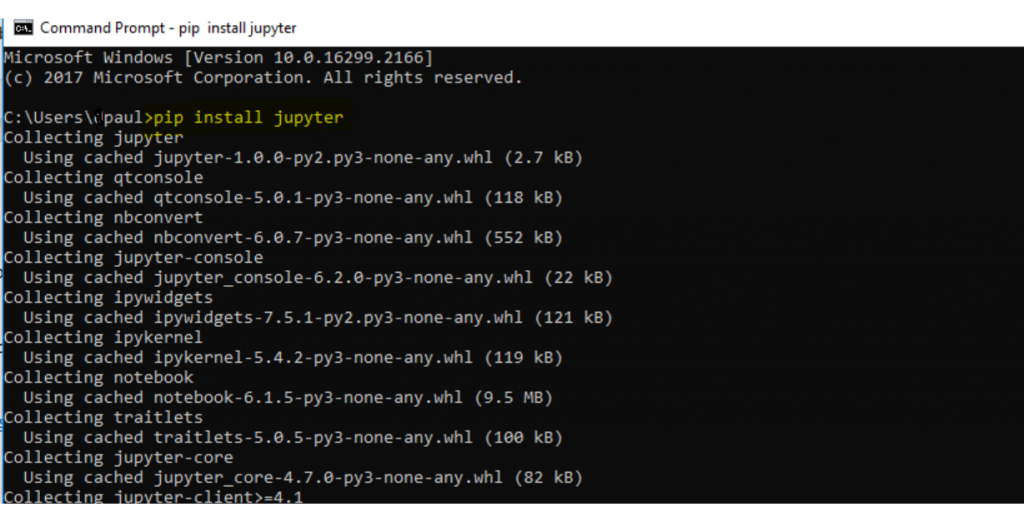
Let's move to the next step, which is to install the Jupyter notebook software. Open command prompt and type the below code:
>pip install jupyter
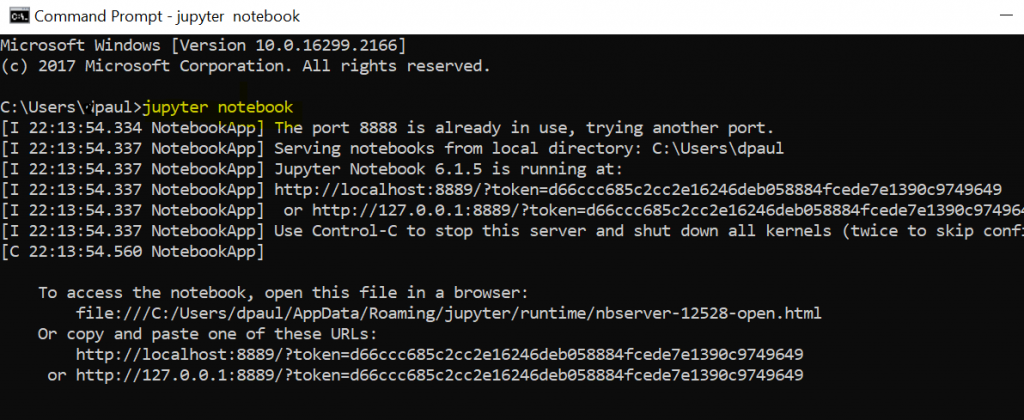
When installation is complete, let's run the Jupyter Notebook web application. To do this, you need to go to a cmd prompt and execute this command, as shown in below figure 8:
Jupyter notebook
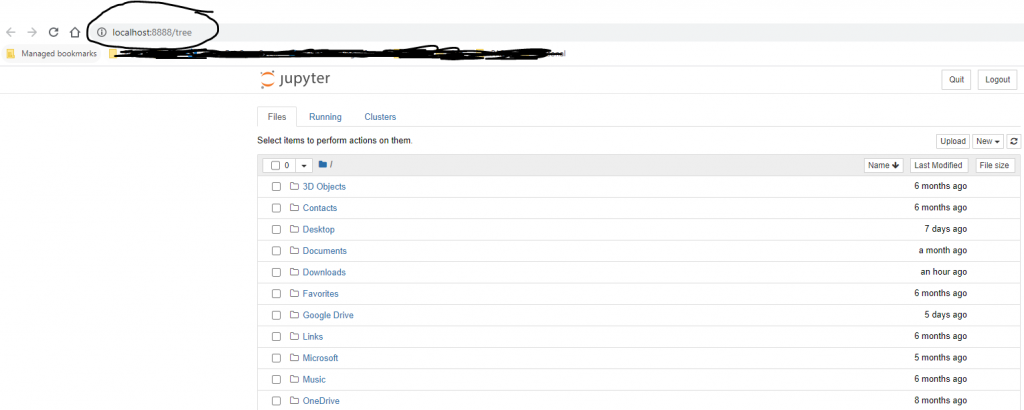
Now you can create a Notebook by choosing 'New' and choose Python 3 as show in fig 10. This will open a new browser tab where you will write the code.
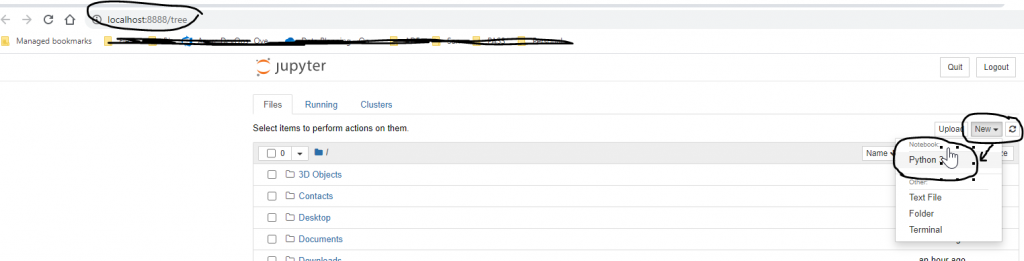
Fig 10: Open Notebook
Let's write hello world program in the Jupyter notebook. The browser will look like figure 11 if you enter this code:
print('Hello world')The output is shown after clicking the 'Run' button.

Now you can write and run other notebooks.
In this article, we learned how to install python and Jupyter Notebooks and have also written a simple hello world program. There are different ways you can install Jupyter Notebook, but I followed this approach and found simple.