Showing posts with label data engineering. Show all posts

Wednesday, November 29, 2023

How to solve available workspace capacity exceeded error (Livy session) in Azure Synapse Analytics?

Livy session errors in Azure Synapse with Notebook

If you are working with Notebook in Azure Synapse Analytics and multiple people are using the same Spark cluster at the same time then chances are high that you have seen any of these below errors: 

"Livy Session has failed. Session state: error code: AVAILBLE_WORKSPACE_CAPACITY_EXCEEDED.You job requested 24 vcores . However, the workspace only has 2 vcores availble out of quota of 50 vcores for node size family [MemoryOptmized]."

"Failed to create Livy session for executing notebook. Error: Your pool's capacity (3200 vcores) exceeds your workspace's total vcore quota (50 vcores). Try reducing the pool capacity or increasing your workspace's vcore quota. HTTP status code: 400."

"InvalidHttpRequestToLivy: Your Spark job requested 56 vcores. However, the workspace has a 50 core limit. Try reducing the numbers of vcores requested or increasing your vcore quota. Quota can be increased using Azure Support request"

The below figure:1 shows one of the error while running the Synapse notebook.

Fig 1: Error Available workspace exceed

What is Livy?

Your initial thought will likely be, "What exactly is this Livy session?"! Apache Livy is a service that enables easy interaction with a Spark cluster over a REST interface [1]. Whenever we execute a notebook from Azure Synapse Analytics Livy helps interact with Spark engine.


Will it fix if you increase vCores?

By looking at the error message you may attempt to increase the vCores; however, increasing the vCores will not solve your problem. 

Let's look into how Spark pool works, by definition of Spark pool; when Spark pool instantiated it's create a Spark instance that process the data. Spark instances are created when you connect to a Spark pool, create a session and run the job. And multiple users may have access to a single Spark pool. When multiple users are running a job at the same time then it may happen that the first job already used most vCores so the another job executed by other user will find the Livy session error . 

How to solve it?

The problem occurs when multiple people work on same Spark pool or same user running more than one Synapse notebook in parallel. When multiple Data Engineer works on same Spark pool in Synapse they can configure the session and save into their DevOps branch. Let's look into it step by step:

1. You will find configuration button (a gear icon) as below fig 1 shown:
Fig 2: configuration button

By clicking on the configuration button you will find details about Spark pool configuration details as shown in the below diagram:
Fig 3: Session details
And this is your session, as you find in the above Fig 3. And there is no active session. 

2. Activate your session by attaching the Spark pool and assigning right resources. Please find the below fig 4 and details steps to avoid the Livy session error.

Fig 4: Fine-tune the Settings

a) Attach the Spark pool from available pools (if you have more than one). I got only one Spark pool.
b) Select session size, I have chosen small by clicking the 'Use' button
c) Enable Dynamically allocate executor, this will help Spark engine to allocate the executor dynamically.
d) You can change Executors, e.g. by default small session size have 47 executors however; I have chosen 3 to 18 executors to free up the rest for other users. Sometimes you may need to get down to 1 to 3 executors to avoid the errors.
e) And finally apply the changes to your session.

And you can commit this changes to your DevOps branch for the particular notebook you are working on so that you don't need to apply the same settings again.

In addition, since the maximum Synapse workspace's total vCores is 50, you can create request to Microsoft to increase the vCores for your organization.

In summary, the Livy session error is a common error when multiple data engineers working in the same Spark pool. So it's important to understand how you can have your session setup correctly so that more than one session can be executed at the same time.


Sunday, March 28, 2021

Step by step guideline to install Jupyter Notebook

Whether you work as a Data Engineer or a Data Scientist, a Jupyter Notebook is a helpful tool. One of the projects I was working required a comparison of two parquet files. This is mainly a schema comparison, not a data comparison. Though the two .parquet were created from two different sources, the outcome should be completely alike, schema wise. At the beginning I was manually comparing them then I thought there must be a tool to do that. Well, that's how I found a Jupyter notebook can be useful to compare two .parquet files' schema.

The Jupyter Notebook can be used for data cleaning and transformation, data visualization, machine learning, statistical modeling and much more. This post will describe the step by step installation process of Jupyter notebook.

Step 1: Install python version 3.7.9

Python is a prerequisite for running a Jupyter notebook, so we need to install python first. Please follow this URL and choose right version to install: https://www.python.org/downloads/.

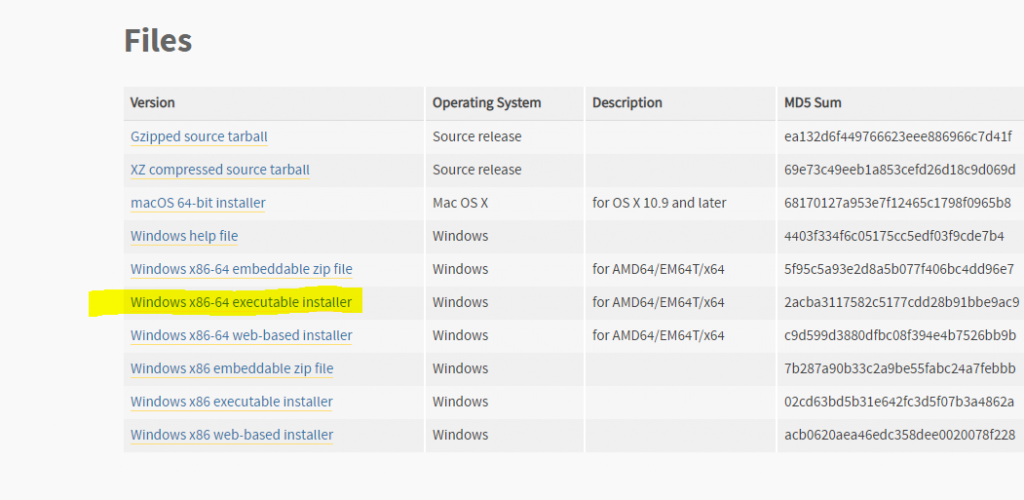
I have chosen 'Windows x86-64 executable installer' for my Windows 64 bit OS. Please choose the version as per your computer Operating system.

Fig 1: Windows Executable

You can download the executable file and save in any location at your computer.

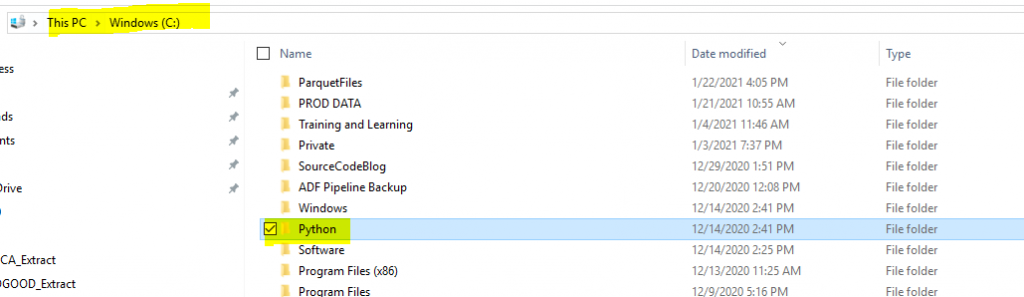
Now next step is to create a 'Python' folder under the C: drive, we will use this folder as installation location at later step.

Fig 2: Python folder under C


Find out the downloaded executable file, I have saved the executable file under Downloads folder (shown in below figure 3). Now double click the executable file to initiate the installation process.

Fig 3: Python Execution file

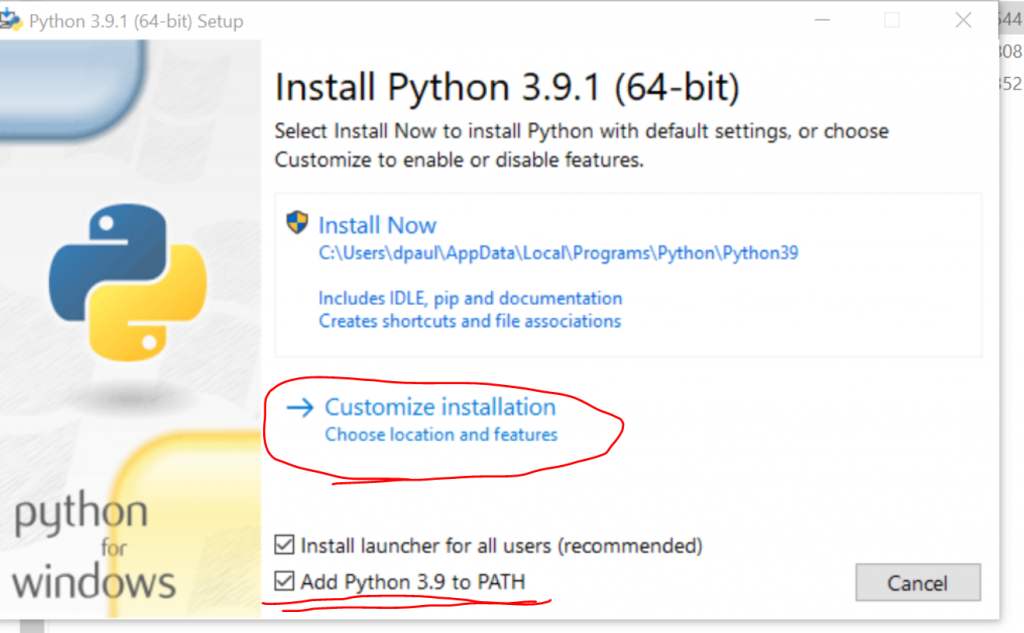
Make sure to choose 'Customize Installation' and check mark 'Add Python 3.9 to PATH' as shown in figure 4. I followed the customization method to avoid setting up environment variable.

Fig 4: Python Installation wizard

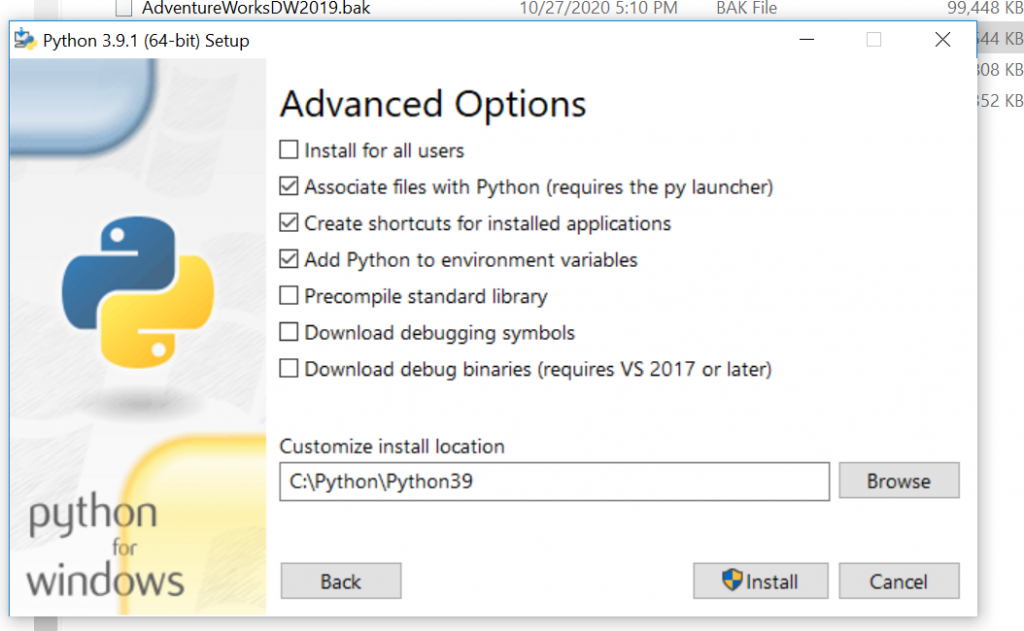
As below figure 5 shown, the Customize installation location, where make sure you put the installation location folder C:\Python\Python39. We have created 'Python' folder in C drive in earlier step (Fig 2)

Fig 5: choose the location

Now hit the Install button. Installation will complete in a minute or two.

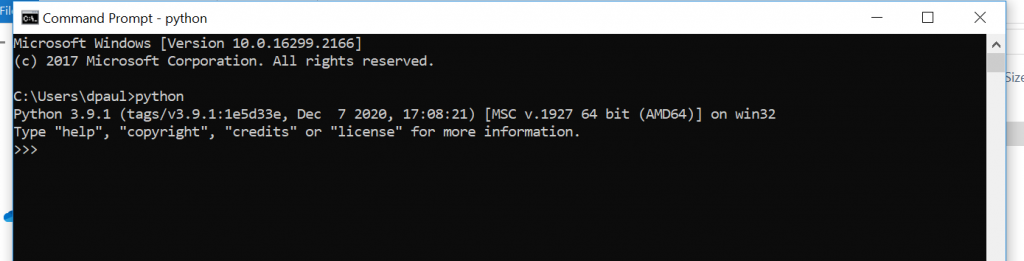
Let's test if python installed successfully, open command prompt and type "python". If python is installed correctly then you should able to see the python version number and some key help, as shown below in Fig 6.

Fig 6: Python installed successfully.

Step 2: Install the Jupyter Notebook

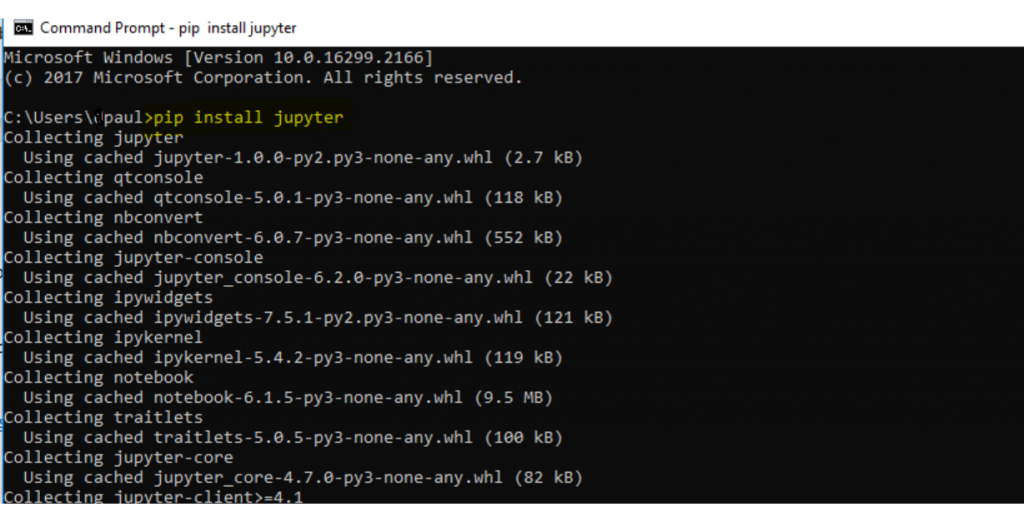
Let's move to the next step, which is to install the Jupyter notebook software. Open command prompt and type the below code:

>pip install jupyter
 
Fig 7: Jupyter Notebook installation started

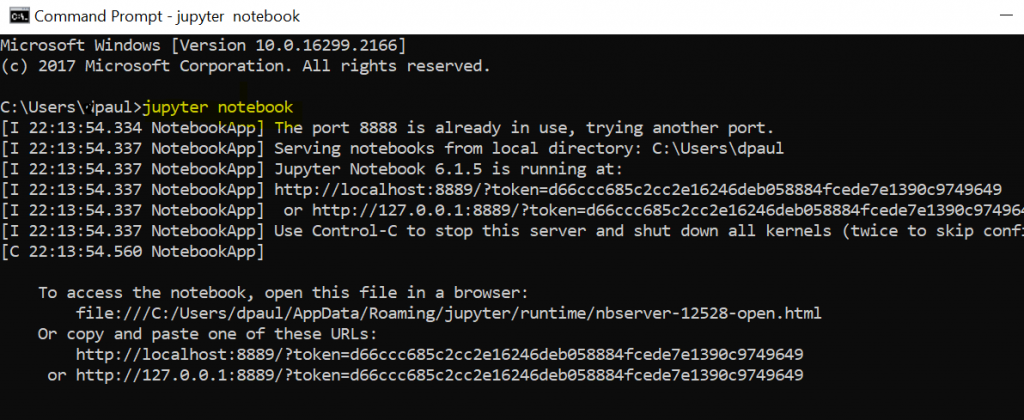
When installation is complete, let's run the Jupyter Notebook web application. To do this, you need to go to a cmd prompt and execute this command, as shown in below figure 8:

Jupyter notebook
 
Fig 8: Opening Jupyter Notebook
 
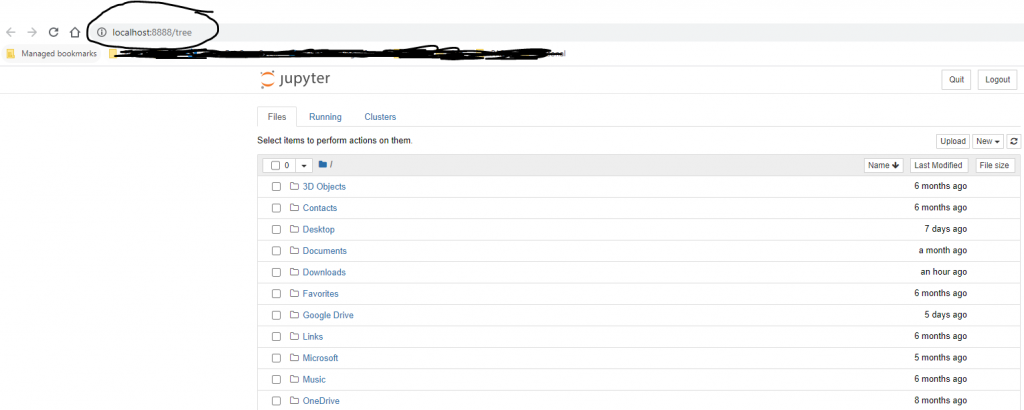
As soon as you hit the above command button, It will open a browser with jupyter notebook as shown in figure 9.
 
Fig 9: Jupyter Notebook on browser

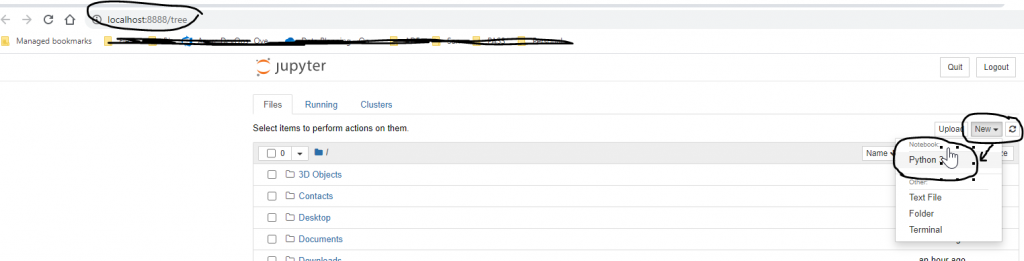
Now you can create a Notebook by choosing 'New' and choose Python 3 as show in fig 10. This will open a new browser tab where you will write the code.

Fig 10: Open Notebook

Let's write hello world program in the Jupyter notebook. The browser will look like figure 11 if you enter this code:

print('Hello world')

The output is shown after clicking the 'Run' button.

 
Fig 11: Hello world in Jupyter Notebook

Now you can write and run other notebooks.

In this article, we learned how to install python and Jupyter Notebooks and have also written a simple hello world program. There are different ways you can install Jupyter Notebook, but I followed this approach and found simple.