This blog post will cover end-to-end deployment guidelines including the right roles and permission required to provision Azure Synapse Analytics for your organization.
Prerequisites: You need to have an Azure Portal login.
After logging into the Azure Portal search with the keyword "Synapse", you will find Azure Synapse Analytics as it is shown in the below diagram 1:

Basics: You need to fill up the basic information about the Synapse workspace.

1. Choose your subscription: Please choose the subscription where you want to provision the Azure Synapse Analytics resource
2. Choose or create a Resource Group: If you already have a resource group then you can choose the resource group or create a new one.
3. Managed resource group: Managed resource group will be automatically created, if you want to give a name please fill up this field otherwise it will be chosen automatically.
4. Workspace name: You need to pick up a globally unique name, it will suggest if the name is not unique.
5. Region: Please pick the region where you want to provision the Azure Synapse Analytics resource. Since I am in the Canadian region so put the region "Canada Central"
6. Data Lake Storage: Please choose Data Lake from the subscription or put it manually.
7. Data Lake Storage Account: This is the Data Lake Storage you have already created or if you need to create one please do so by choosing "Create new"
8. Data Lake Storage File System: The file System name is a container name in the Data Lake storage.
This is how it looks after filling up the Basics information (shown in Fig 3)

Security:
Let's move to the Security tab as shown below in figure 4:

Networking: You need to choose the right networking options for your organization. If you are provisioning for demo purposes then you can allow the public network or allow outbound traffic. However, if data security is top of your mind I would suggest following the below setup (fig 5) for the networking.

1. Managed virtual network: Enable the Managed Virtual network so that communication between resources inside Synapse happens through the private network.
2. Managed Private End Point: Create a managed private endpoint for the primary storage account (we did a storage account under the Basic tab and step #6)
3. Allow outbound Traffic: I have set this "No" for not limiting only the approved Azure AD tenants. However, the data security is tightened through the next point #4
4. Public Network Access: Public network access has been disabled, which means there is no risk of exposing the data to the public network, and communication between resources will take place via private endpoints.
Tags: It's the best practice to have Tags. The tagging helps identify resources and deployment environments and so on.

Review and Create: It's the final steps that show you a summary for you to review. Please verify your storage account, database details, security, and networking settings before you hit the create button (shown below fig 7)

You have done with provisioning the Azure Synapse Analytics, as an Admin, you can work with the Azure Synapse Analytics.
However, if any additional team members want to work with the Azure Synapse Analytics tool you need to do a few more steps.
You need to add a user to the Synapse workspace, as shown in fig 8


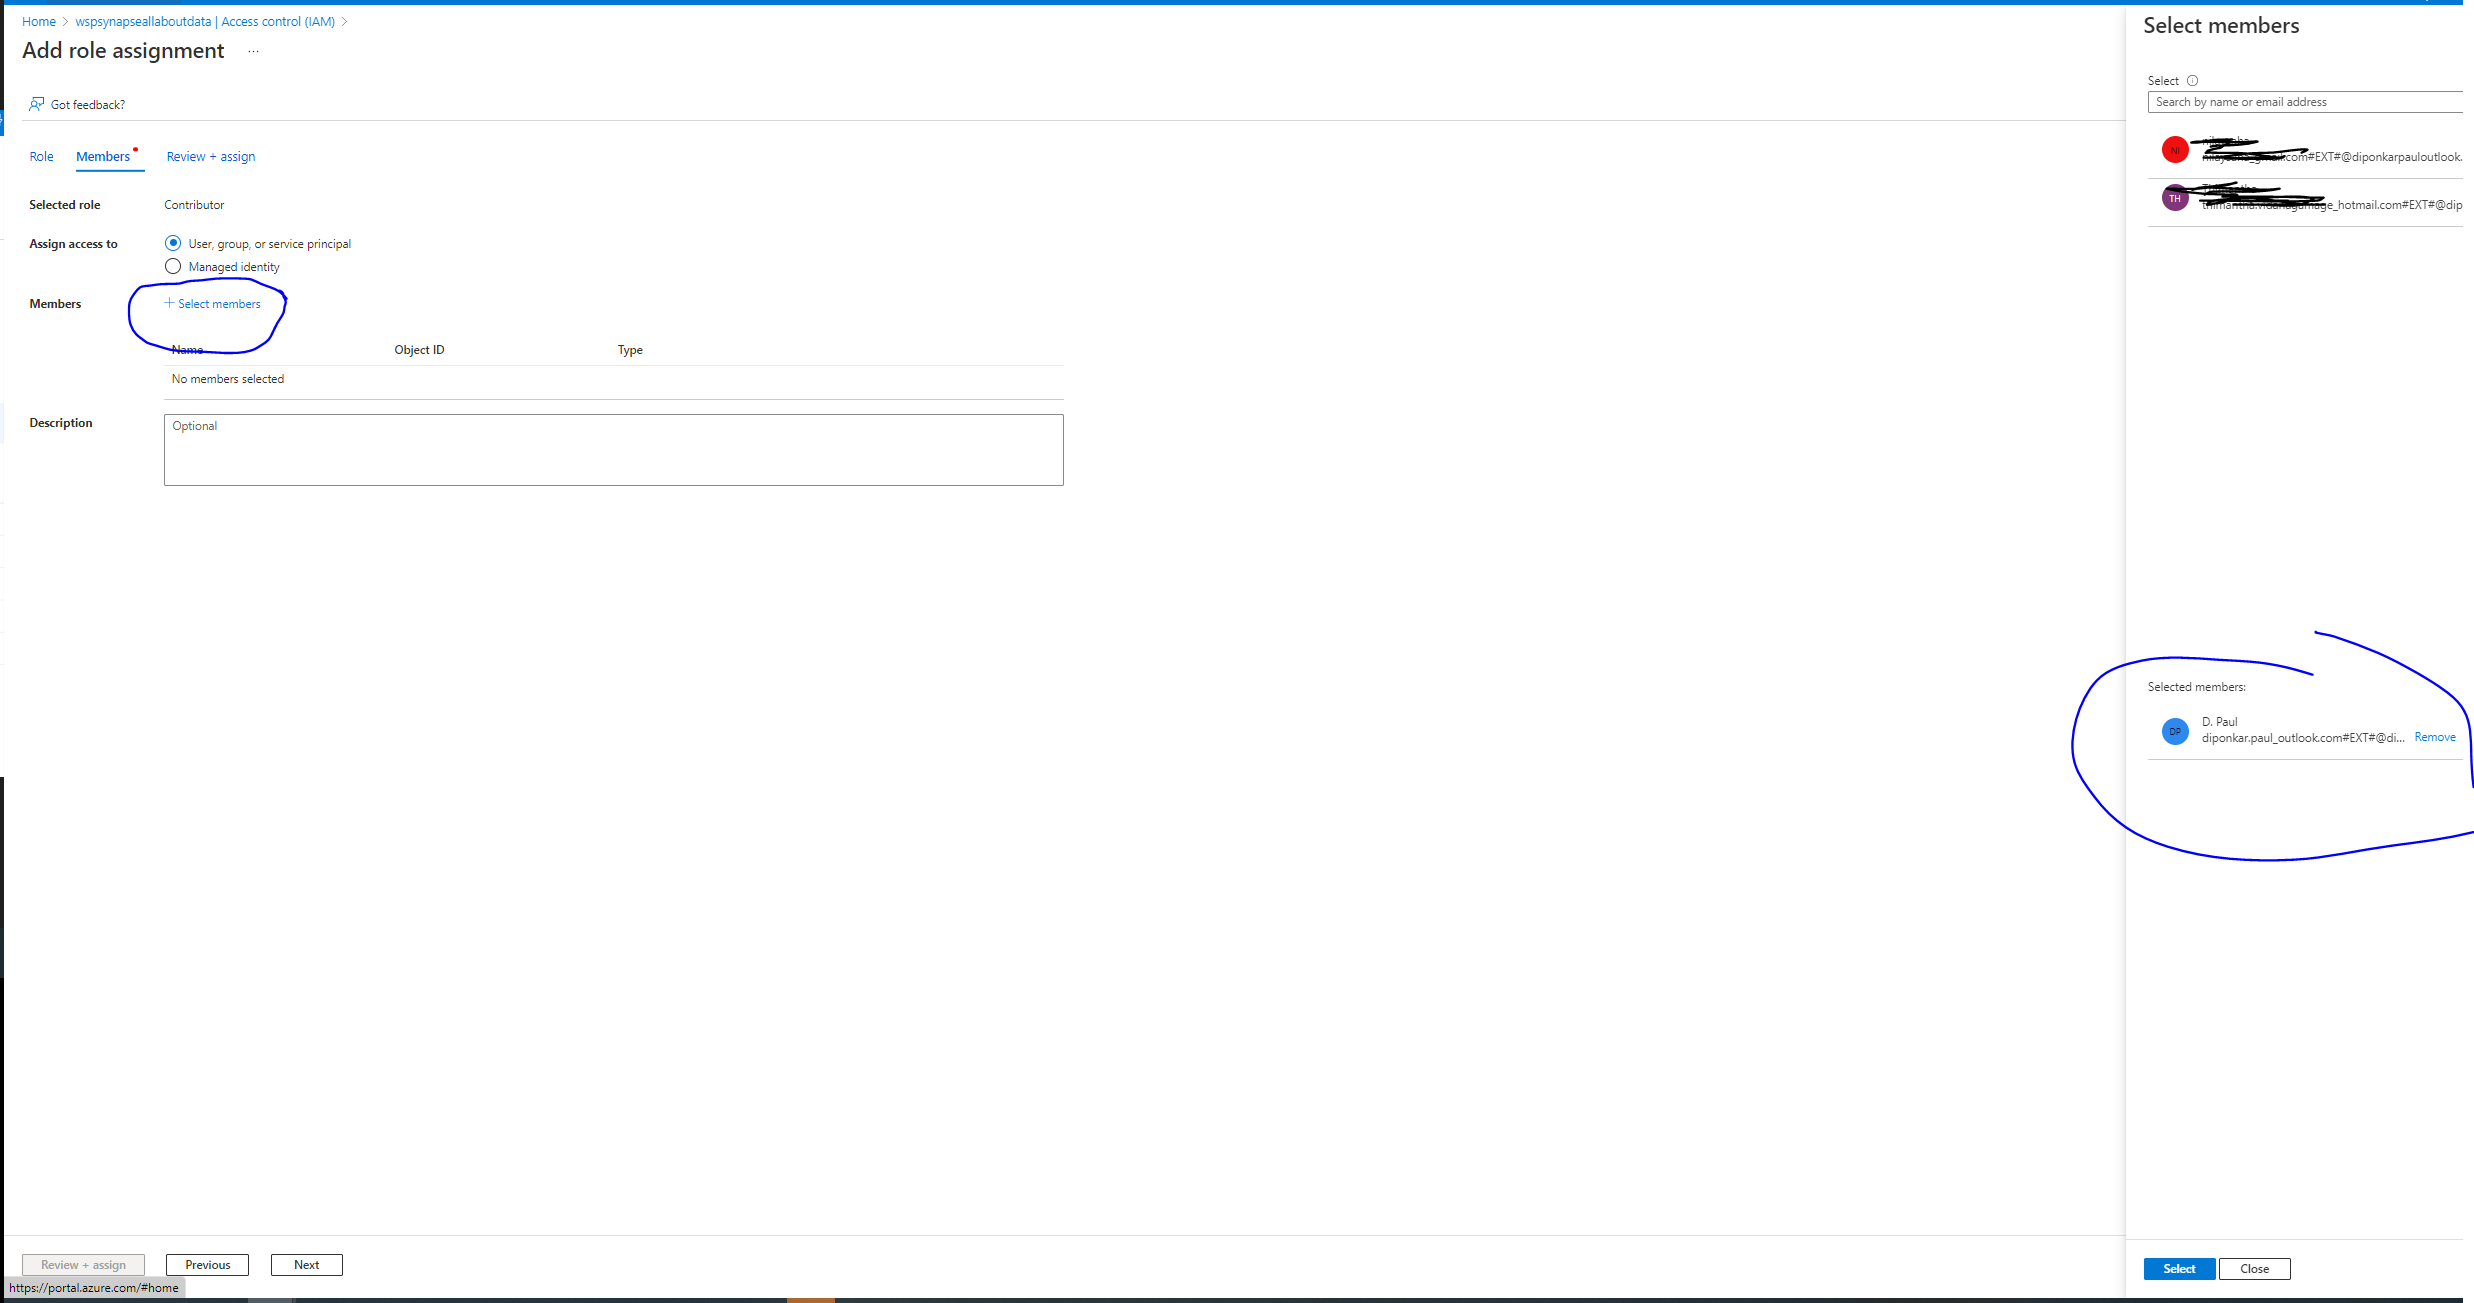
After adding the right role and member to the Synapse workspace, you also need to add the user to the Azure Synapse Portal as shown in below fig 11. At first click "Access Control" and then by clicking "+Add" button you can assign members or AD group to the right role. If you are giving access to Data Engineers or Developers they will require Contributor role. In below fig 9, I have given Contributor role to the member.

Hpwever, to have access to Serverless SQL Pool and Linked Service creation the members will require more permission. To know more about Synapse roles please go through this Microsoft documentation.
No comments:
Post a Comment