Showing posts with label Azure DevOps. Show all posts

Sunday, February 5, 2023

How to implement Continuous integration and delivery (CI/CD) in Azure Data Factory

Continuous Integration and Continuous Deployment (CI/CD) are integral parts of the software development lifecycle. As a Data Engineer/ Data Professional when we build the ETL pipeline using Azure Data Factory (ADF), we need to move our code from a Development environment to Pre-Prod and Production environment. One of the ways to do this is by using Azure DevOps.

Target Audience:

This article will be helpful for below mentioned two types of audiences.

Audience Type 1: Using DevOps code repository in ADF but CI/CD is missing

Audience Typ 2: Using ADF for ETL development but never used DevOps repository and CI/CD

For Audience Type 1 you can follow the rest of the blog to implement CI/CD. And for audience type 2, you need to first connect ADF with the DevOps repository, and to do so please follow this blog post and then follow the rest of this blog post for the CI/CD.

This blog post will describe how to set up CI/CD for ADF. There are two parts to this process one called 1) Continuous Integration (CI) and 2) Continuous Deployment (CD).

1) Continuous Integration (CI)

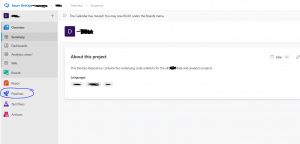
First, you need to log in to the Azure DevOps site from your organization and click the pipelines as shown in fig 1.
Pipeline creation

Fig 1: DevOps pipelines

And then click “New pipeline” as shown in fig 2

New Pipeline

Fig 2: New pipeline creation

And then follow the few steps to create the pipeline:

Step 1: Depending on where your code is located, choose the option. In this blog post, we are using the classic editor as shown below in fig 3.
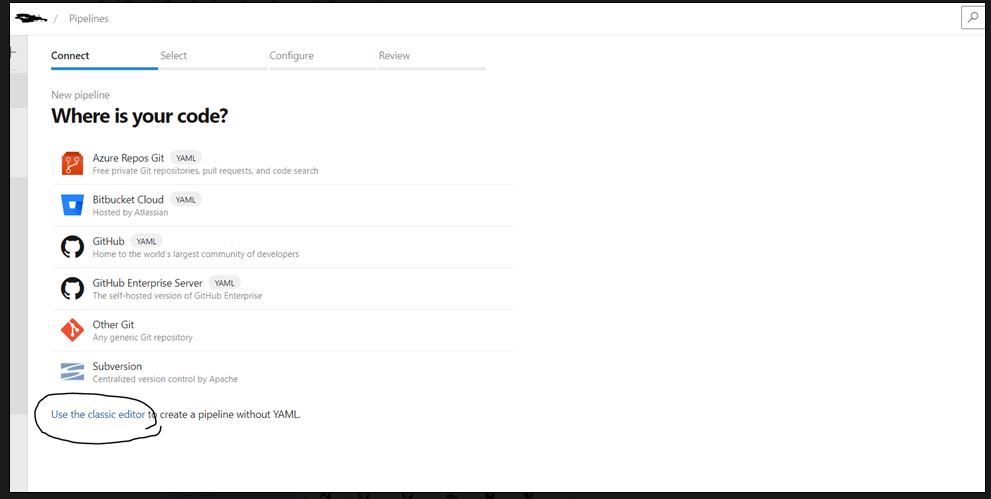
Fig 3: Choose the right source or use the classic editor

Step 2: In this step, you need to choose the repository that you are using in ADF and make sure to select the default branch. We have chosen ADF_publish as a default branch for the builds.
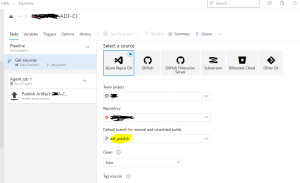
                         

Fig 4: selecting the branch for the pipeline

Step 3: Create an Empty job by clicking the Empty job as shown in below figure 5
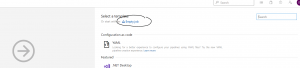
Fig 5: Selected Empty job

Step 4: You need to provide the agent pool and agent specification at this step. Please choose Azure Pipelines for the agent pool and windows latest for the Agent specification as shown in figure 6.
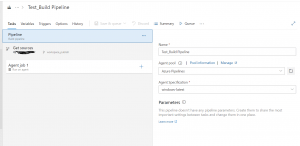
Fig 6: Agent pool and Agent specification


Now click "Save and Queue" to save the build pipeline with the name “Test_Build Pipeline” as shown below figure:
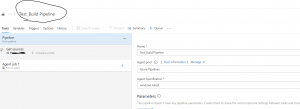
Fig 7: Saved the build pipeline

The build pipeline is completed, and the next part is creating the release pipeline which will do the continuous deployment (CD) means the movement of the code/artifacts from Development to the pre-prod and Production environment.

2) Continous Deployment (CD)

The very first step of Continuous Deployment is to create a new release pipeline. And this release pipeline will have a connection with the previously created build pipeline named "Test_Build Pipeline".
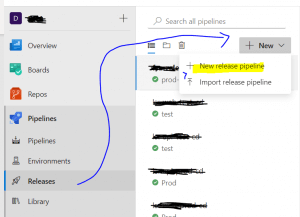

 Fig 8: Release Pipeline

As soon as you hit the new release pipeline following step will appear. Please close the right popup screen and then click +Add on the artifact as shown below figure:
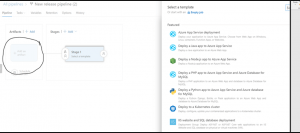


  Fig 9: Create the artifact

Next step to connect the build pipeline and the release pipeline, you will find out the build pipeline that you created at the CI process earlier and choose the item “Test_Build Pipeline”
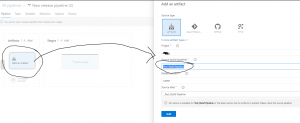
               

Fig 10: connecting the build pipeline from the release pipeline

Click on Stage 2 and select an empty job as shown in fig 10
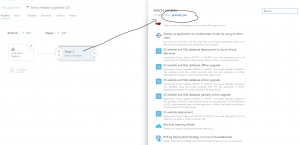
empty job
  Fig 11: Empty job under release pipeline

After the last steps the pipeline will look like the below, now please click on 1 job, 0 tasks. We need to create an ARM template deployment task
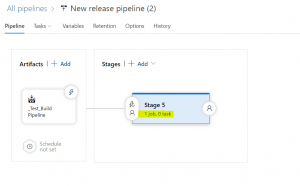
job and tasks

Fig 12: Release pipeline job and task

Search for ARM template deployment, as shown in fig 13. ARM template Deployment task will create or update the resources and the artifacts e.g. Linked services, datasets, pipelines, and so on.
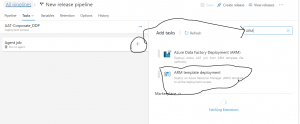
search for ARM template
  Fig 13: search for the ARM template

After adding the ARM template, you need to fill in the information for 1 to 12 as shown in the below diagram:
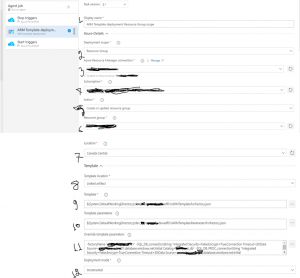
ARM template configuration

Fig 14: ARM Template information

  1. Display Name: Simply put any name to display for the deployment template
  1. Deployment Scope: You have options to choose the deployment scope from Resource Group, Subscription, or Management Group. Please choose Resource Group for ADF CI/CD.
  1. Azure Resouce Manager Connection: This is a service connection; if you already have a service principal you can set up a service connection or create a completely new one. The Cloud Infrastructure team in your organization can set it up for you. You will also find details about Service Connection in Microsoft Learn.
  1. Subscription: Please choose the right subscription where the resource group for the ADF instance resided for the pre-Prod or Production environment.
  1. Action: Please Choose "Create or Update resource group" from the list.
  1. Resource Group: The resource group name where the ADF instance is lying.
  1. Location: Resource location e.g. I have used Canada Central
  1. Template Location: Please choose either "Linked Artifact" or "URL of the file". I have chosen "Linked Artifact" which will connect the ARM template which is already built via Continuous Integration (CI) process.
  1. Template: Please choose the file "ARMTemplateForFactory.json"
  1. Template parameters: Please choose the template parameter file: "ARMTemplateParametersForFactory.json"
  1. OverrideTemplate Parameters: Make sure to overwrite all the parameters including pre-prod or production environment's database server details and so on. Go through all the parameters that exist in the Development environment you need to update those for the upper environments.
  1. Deployment mode: Please choose "Incremental" for the Deployment mode.

After putting all the above information please save it. Hence your release pipeline is completed.

However, to make this pipeline runs automated, means when you push the code from the master to publish branch you need to set up a Continuous deployment trigger as shown in fig 15
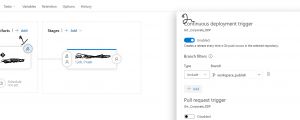
release trigger

fig 15: Continuous deployment Trigger


The last step of the CD part is creating a Release from the Release pipeline you just created. To do so please select the Release pipeline and create a release as shown in fig 16. 
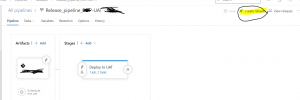
Create release

Fig 16: Create a Release from the release pipeline

 You are done with CI/CD. Now to test it please go to your ADF instance choose the master branch and then click the 'Publish' button as shown below in figure 17. The C/CD process starts and the codes for pipelines, Linked Services, and Datasets move from the Development environment to Pre-Prod and then to Production.
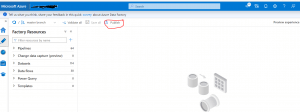
publish from ADF

Fig 17: Publish from Azure Data Factory (ADF)

The blog post demonstrates step by step process of implementing CI/CD for ADF by using ARM templates. However, in addition to ARM template deployment; there is another ARM template named "Azure Data Factory Deployment (ARM)" which can also be used to implement CI/CD for ADF.


Thursday, December 16, 2021

How to integrate Azure DevOps with Azure Synapse Studio?

There are two ways you can develop and execute code in Azure Synapse Studio:

  1. Synapse live development
  2. Git enabled development.

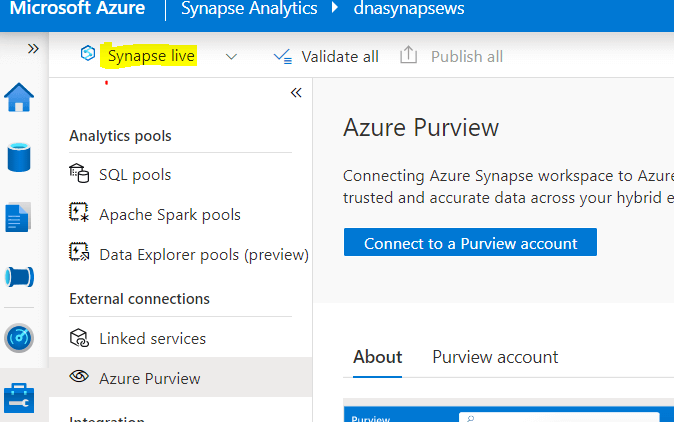
By default, Synapse Studio uses Synapse live, as shown in Fig 1. With Synapse live you can't work in a group for the same codebase whereas by enabling Git collaboration, this becomes easy. This article will demonstrate a step-by-step guide to set up Git-enabled development in Synapse Studio.

Fig 1: Synapse live

With the Git enabled development approach either you can use Azure DevOps Git or GitHub. This article will guide you using Azure DevOps Git integration.

Prerequisites

There are two prerequisites before following along with this article:

  1. Permissions - You must need to have contributor or higher role in the Synapse workspace to connect, edit or delete the source code repository.
  2. Git Repository - You also need to create the Git repository. You will find more details about creating an Azure DevOps repository in this link.

Choose from Two Different Options

There are two ways you can connect Azure DevOps Git from Synapse Studio, either from the global bar or from manage hub. You will find details below how to choose from the two options.

Option 1: The global bar

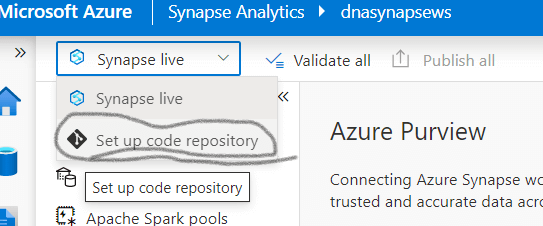
If you follow the figure 2, select the "Synapse live" drop down menu then you will find "Set up code repository". Choose this option.

Fig 2: Setup code repo from global bar

Option 2: The Manage hub

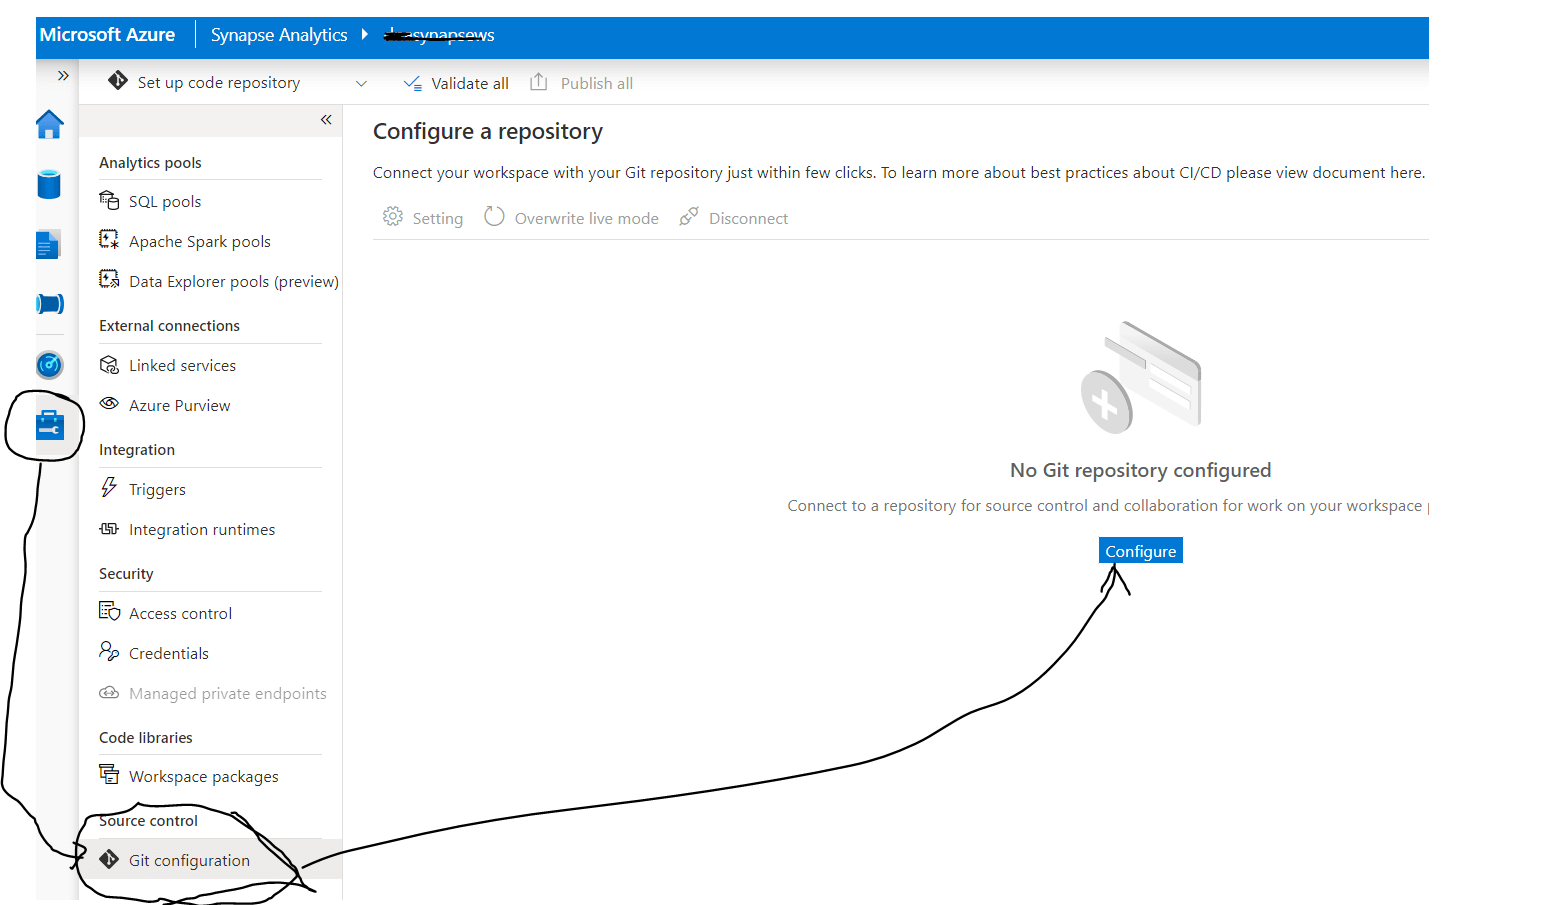
From Synapse studio look at the left bottom menu, as shown in figure 3. Those the last icon that looks like a toolbox. This is the Manage selection. Then choose the Git configuration item int eh menu that is shown to the right of this icon. In the main pane, select configure.

Fig 3: setup code repo from manage hub

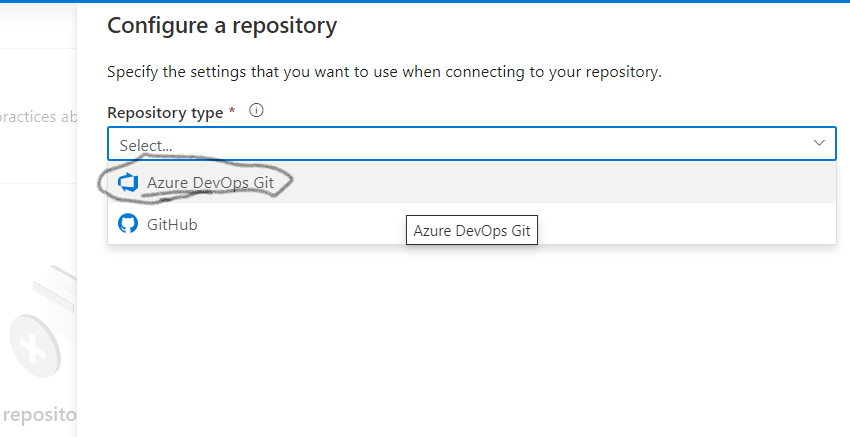
Either of the the above two options will take you to the next step, which look like Fig 4. By selecting Azure DevOps Git you connect Azure DevOps Git with the Synapse Studio.

Fig 4: Choose either DevOps Git or Github

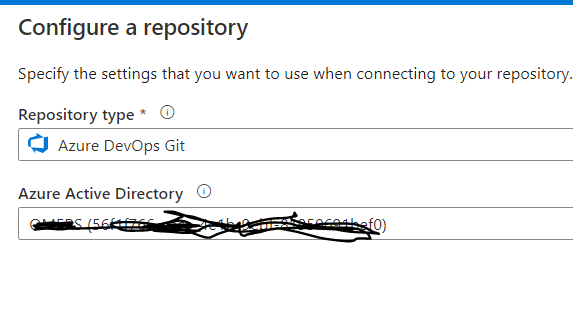
At the next step you will find one more attribute populated, as shown in the below figure 5. Please select the appropriate Azure Active Directory from your organization.

Fig 5: Connect the AD tenants

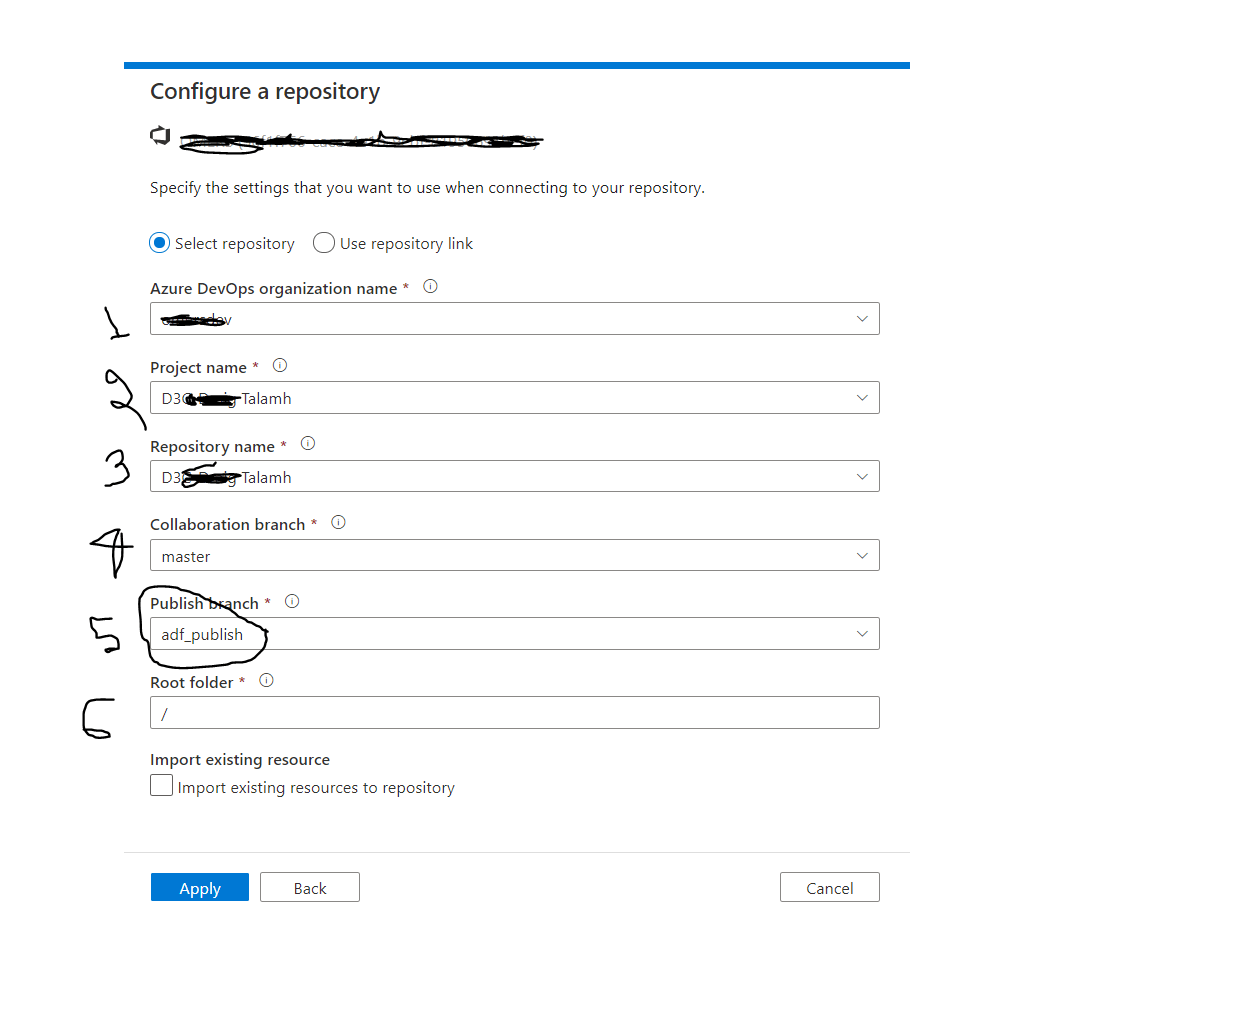
After clicking "Next" you will enter all the necessary information to choose your Git repository which is already created in your organization. Each item shown in Fig 6 is explained below:

  1. Azure DevOps Organization: In the dropdown you may find more than one organization please select the appropriate organization. It's organization name which have been created when Azure DevOps repository is configured.
  2. ProjectName: There are more than one project in the list, select the relevant one. This is Azure DevOps repos project name which you created earlier.
  3. RepositoryName: Please select the right repository from the list or you can also create a repository.
  4. Collaboration branch: By default, it's master. This is the branch where all other branch will be created from. Code will be merged to this branch from other branches as well as you will publish the code from this branch.
  5. Publish branch: The Publish branch is the branch in your repository where publishing related ARM templates are stored and updated. In general adf_publish is your publish branch but you can also make any other branch as a publish branch.
  6. Root folder: Your root folder in your Azure Repos collaboration branch.


Fig 6: Configure repository

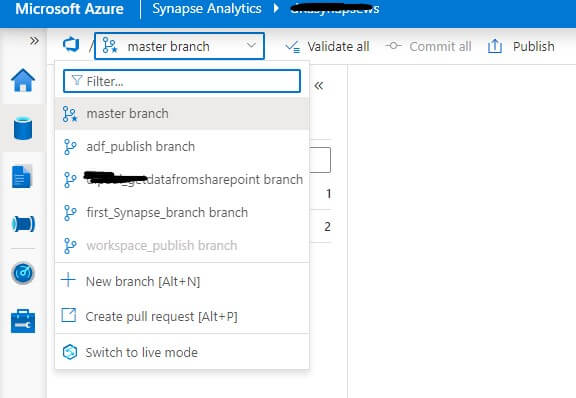
After completing all the above steps, click "Apply". When this process is successfully completed you should able to see the Git repository branches, as shown in Fig 7.

Fig 7: Synapse Studio after connecting with Azure DevOps Git

How to disconnect from Azure DevOps Git

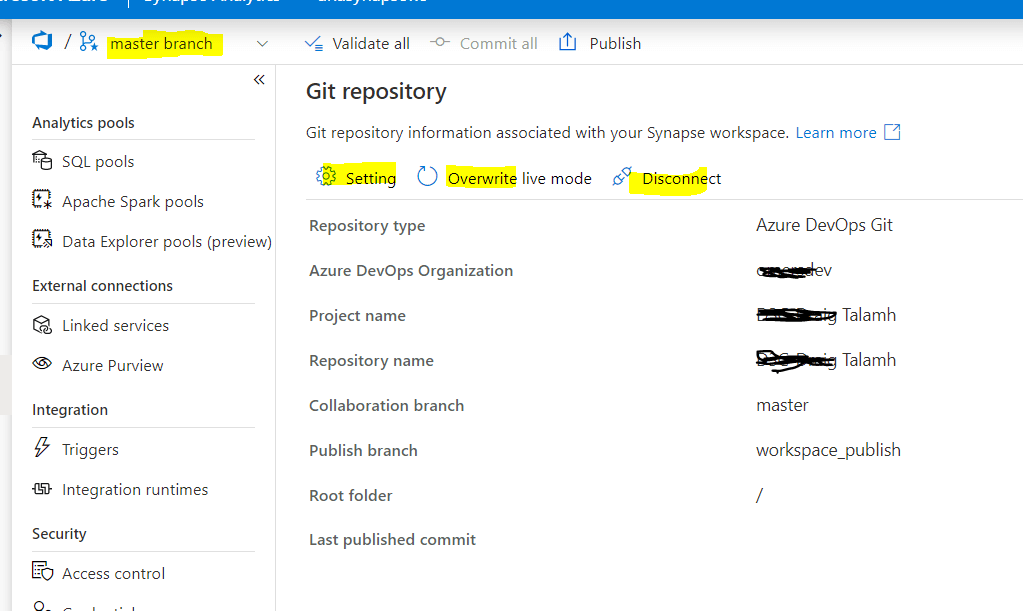
To disconnect from Azure DevOps Git repo, you need to go to Manage-> Git configuration, as shown in Fig 8. There is a Disconnect menu item at the top.

Fig 8: Disconnect from Azure DevOps Git Repo

Please note that "Disconnect" option will be disabled if you on any other branch than master. So, make sure you choose master branch if you need to disconnect the Azure DevOps Git Repo.

In summary, there are two ways to Develop and execute code in Azure Synapse and collaboration is only possible with Git enablement. The article depicted how to connect Azure DevOps Git with Azure Synapse Studio as well as how to disconnect them whenever required.

Saturday, July 20, 2019

New to Git and Github? How Azure DevOps connect with Git? Must know.


Those who have been using TFS for a long and now you know 'Git' is a 'thing' that you can't avoid.  When you start with Git, please don’t expect it will be exact same like TFS. When I have started with TFS 10 years back, it was super easy to start with, however for Git, start with a mindset that, command line is required.

As you know Git, other name come along which is 'GitHub' and then confusion grows. 
Many people think Git and GitHub are the same, But it’s not. Git is the version-Control software and GitHub is your storage with sharing capability. If you don’t want to share your code with anyone but still having versions maintenance you don’t need GitHub (which is unlikely though). Moreover, alternative to GitHub you can use Azure DevOps.

Those of you used to work with TFS, maybe already got to know about Azure Devops which give you option to either use Git or TFS as your version-control tool. It means in this scenario, you don’t need GitHub. Below picture depicts Git relate with Azure DevOps and GitHub.

Fig 1: Git, GitHub and Azure Devops

Let's start with beginner steps to work with Git.

Step 1: Install Git at your PC.
Follow the link and choose your right platform to download the file and then install it.
https://git-scm.com/downloads

Step 2: Open the Git command window, which look like below

Fig 2: Installed Git software

Now, you would like to create a solution or file which you would like to add to the Git and would like to work with other colleagues.

Adding file to Git means, the folder where you keep the files/code should be recognized by Git. To achieve that, you need to do following:

For example, your code is located under C\Code and you want to make this as Git repository.

After opening the Git Bash, write below command:

1 cd C:\                                                                                                            

2 cd Code
3 git init

Now the folder is ready to use as Git repository

'Initialized empty local Git repository in C:/Code/.git/'

And you will a find a git folder created in the folder C:/Code/

Now you can copy all your files under the folder C:/Code and let's add a file to the local Git repository.

4. git add Testcode.txt

and Commit the code in local repository

5.  git commit -m 'added test file'


Now your solution or all code files is under git repository, If you work on your own and wanted to have version control so you can always go back to your earlier code, which is ready at this stage.

Step 3:
Let's get to the next step where you would like to push this code to either Github or Azure Devops. In my case I have uploaded the code to Azure DevOps.

How do you do this?

Login to the Azure devops : https://dev.azure.com/

Create repository , choose Type as 'Git'

Fig 3: Create repo under Azure Devops
After finishing the repository creation, you will find like below window, where you need to copy the command line code.


Now go back to your  'Git Bash' command window, and write two lines of code:

6. git remote add origin https://d*****@dev.azure.com/dpaul0628/DpaulGithub/_git/LoveGit
7. git push -u origin –all

Now if you login to the Azure DevOps, you will see the local file you have committed earlier is uploaded to the Azure DevOps.